Devices Client Installer
Disable USB Selective Suspend
Overview
Windows 10 includes the USB selective suspend feature that lets you automatically put USB devices in a very low-power state when they're not actively in use. It's an important feature because it helps prolong battery life on your laptop or tablet, but it may also cause problems with certain peripherals connected to your PC. If a USB device isn't working correctly, you can try to disable selective suspend on Windows 10. That may cause your computer to draw more power, but it may help to identify and fix the problem as well.
If you're changing the settings on a laptop or tablet, you'll see two options: On Battery and Plugged in, so make sure to change those settings accordingly. Once you complete these steps, Windows 10 will no longer power off USB devices connected to your computer, which can fix any problem you may have as a result of this feature. While this guide focuses on Windows 10, USB selective suspend has been around for a long time, and you can use the same steps on machines running Windows 8.1 and Windows 7.
Windows 10
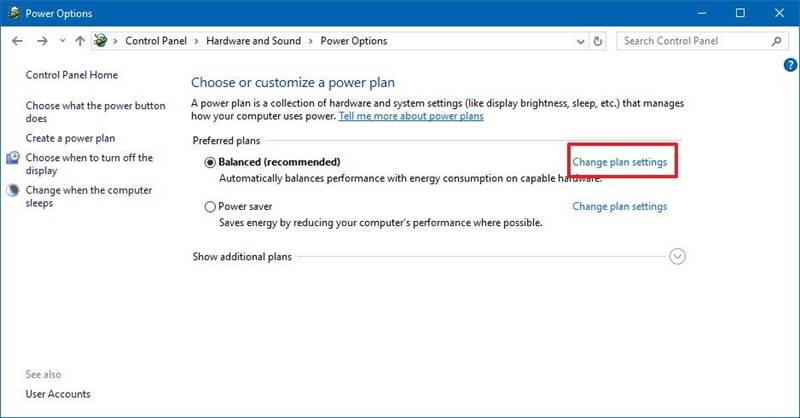
- Open Control Panel
- Click on Hardware and Sound
- Click on Power Options
- Under "Preferred plan," click the Change plan settings link for the plan you're currently using. (If you change the settings on the power plan that isn't active, this won't work.)
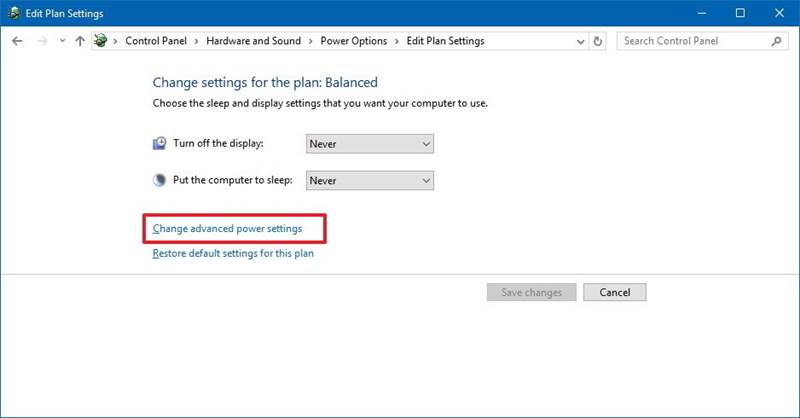
- Click the Change advanced power settings link
- Expand USB selective suspend setting
- Select Disabled from the drop-down menu
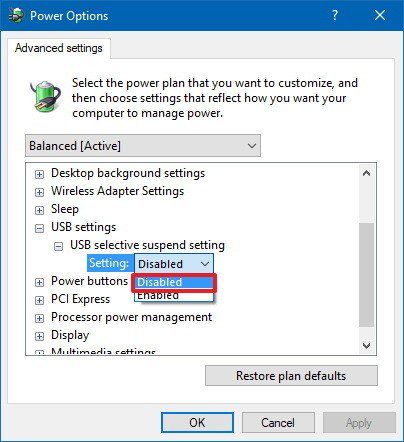
- Click Apply
- Click Ok